Buying online I do quite a bit of my shopping online now (and yes, I'm sure saying "online" makes me sound old) and part of that is the joy of receiving a parcel. I guess it taps into the childhood pleasures of Christmas and birthday events. Embrace the inner child, I say. It's the anticipation of a treat coming your way. This lady understands, she's been putting on her best straw cone-hat and waiting by the chinoiserie letterbox every day since 1961!
The only downside, of course, is that you have to pay postage and packaging to get your treats to your letterbox. Here at the Shanghai Lil and The Scarlet Fez shop, I have kept the postage costs down to a minimum. Here they are: 1 to 3 bars - $7.00 flat rate; and 4 bars and above - $11.00 flat rate. Now, following on with the '60s theme, here is a song I'm obsessed with at the moment - very sweeping and dramatic (the sort of song someone who would use Madame X... might like...):
Photo: detail from found photo dated October 1961. Shanghai Lil and The Scarlet Fez collection.
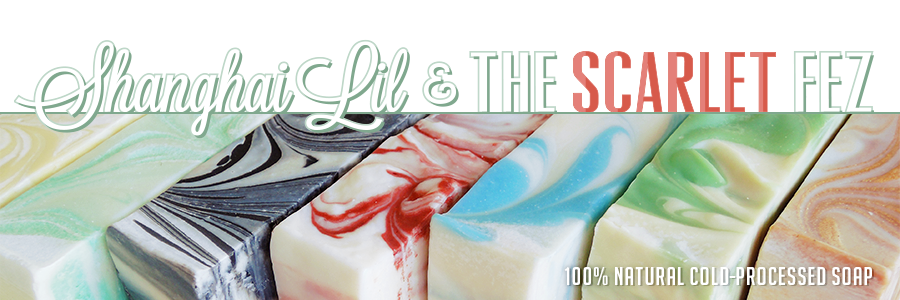
The gin and tonic of soaps! Having spent the last 4 weeks curing, The Fez No.1 is now ready and available through Shanghai Lil and The Scarlet Fez's shop. This beautiful new soap has a wonderfully aromatic scent of juniperberry, wormwood, lemony may chang and lemongrass. It is packed with skin loving and super conditioning oils including olive oil, olive pomace, shea oil and vitamin E-rich rice bran oil. And it looks a treat too, with a rich golden yellow swirl of natural annatto colouring. All vegan, no palm oil and totally natural!
A new soap Just released today, Madame X... is a wonderfully sensuous soap. Spicily scented with ylang ylang, rose geranium and black pepper, it is packed with super luxurious and skin-loving oils including olive oil, olive pomace, cocoa butter, apricot kernel oil and the exotic musk melon oil. The soap has a deep and mysterious colour - from Australian red clay. It gives the soap an antique feel - it makes me think of a late eighteenth century adventuress racing across the moors in a glittering black carriage. But I have some imagination! What is clear is that this soap feels and smells luxurious. Now available in Shanghai Lil and The Scarlet Fez's store, which you can access by clicking the shop button above. Let me know if you have any questions about Madame X... - I shall be discrete...
A deliciously scented new soap A wonderful addition to the Shanghai Lil and The Scarlet Fez collection - Sunday Spice. With a blend of oils packed with skin-loving goodness, like olive oil, olive pomace, cocoa butter, shea oil and avocado oil, Sunday Spice is a rich and luxurious soap. Scented with carrot seed and ginger essential oils, this soap will make your mouth water! Delicious! Sunday Spice is all natural, vegan and palm oil free. Gentle on your skin and a treat for your senses! Now available through Shanghai Lil and The Scarlet Fez's store. Pay a visit by clicking the shop button in the right-hand column.
You will need: 1 x pencil 1 x piece of paper 1 x dress-maker's measuring tape (or a piece of string and a retractable measuring tape) 1 x roll of masking tape 1 x calculator 1 x paint brush or mini-roller 2 x cans of paint, different colours 1 x round tapered pot; concrete, terracotta or fibreglass Step 1 Choose a plain, smooth pot. Fibreglass is great because it is lightweight and smooth. Terracotta and concrete pots may be more problematic as they tend to leach moisture through the sides, which isn't good for paintwork. In this case, I'm painting a terracotta pot because I couldn't find a fibreglass one, so I'll take my chances. Step 2 You will need to seal the pot with an appropriate outdoor cement sealer. I used Bondall 'Pot and Ornament Sealer', and this is readily available from hardware stores. Give the pot at least 2 coats of sealer, as recommended by the sealer manufacturer. Apply the sealer to the lip of the pot and to about 10cm down the inside rim.
Step 3 Choose your paint, in two colours. I have selected some left-over paint from when our house was done. An off-white and a light blue. The paint needs to be an outdoor paint, suitable for use on cement. Use the lighter colour paint as your base. Paint the entire outside of the pot (you don't need to paint the base), including the lip and about 10cm into the inside of the pot. When you plant out the pot, you will still get to see the inside lip. Two coats, at least.
Step 4 Ugh, the hard bit. This can be a very painful process, so be prepared. Don't do this bit when you're just about to go to work or when you're expected for lunch somewhere in half an hour. Tell everyone to just leave you alone for a good hour! Of course, you may be a mathematically inclined person, so this might be a cinch for you! You need to plot the stripes. As a start, I should say that this is not an exact science. The stripes will not be perfectly regular, you will have all sorts of weirdness happening, but you need to remember that when the pot is finished and sitting in your garden, the overall impression is perfect! And I defy you to find any pot this glamorous in a shop! So, here goes. Measuring the circumference of the top outside rim of the pot is difficult if you try wrapping a dress-makers measuring tape around it. So, I recommend just measuring the diameter of the pot, as best you can. With the measuring tape, stretch it across the top of the pot at the broadest part. Measure the distance between the outside rim of one side and the outside rim of the other side. Multiply this amount by 3.14 and that will be your circumference. (This is where the calculator comes in unless you're a brainbox). Write this down. Repeat this exercise by turning the pot upside down and measuring the bottom circumference. Write this down. You need to determine how many stripes you want (and I mean stripes of both colour). I suggest being fairly generous with the width of the strip unless you really want to spend a lot of time painting narrow stripes. And make it an even number. Odd numbers will leave you with two stripes of the same colour next to each other. I chose 10 stripes for this pot. To mark out where the stripes need to be, start with the top of the pot. Divide its circumference by the number of stripes you have. This will give you the distance between each edge of a stripe. The space between two marks is the width of your stripe. If your pot has a seam, you are lucky, and you will find out why shortly. If not, it doesn't matter. Make a small mark with a pencil on the outer rim of the pot, where you want to start (if you have a seam, I'd start here). Then, you need to mark out each point on the pot. Using a measuring tape to do this can be tricky because it is hard to hold and mark at the same time, so I suggest just getting your piece of paper and folding it so one side is as long as the figure you have just worked out for the width of each stripe. Then, starting with your first mark, place the paper with one edge on that mark, and mark the point where the paper ends. Do this around the circumference of the top edge until you arrive back at the first mark. It may not be perfect! If you are quite a bit out, say by 2cm, you need to increase the width of each stripe by a couple of millimeters. This can be time-consuming and frustrating, but stick with it. To repeat the process on the bottom, you need to make sure that you align one of the top marks with your first mark on the bottom. If you have a seam on the pot, you won't need to do this, just start the measuring on the bottom at the seam. Otherwise, using your measuring tape or string, start at your first mark and hold the tape or string so that it drops in a fairly straight line downwards. As best you can try to mark the bottom outside rim of the pot where the tape or string is. This will give you a fairly close alignment between the top and the bottom and hopefully, a straight stripe. Then repeat the process of marking out the smaller circumference.
Step 5 It helps a bit to mark with an x which spaces you will be painting with your second colour. Using the masking tape, you need to block out the stripes you do not intend to paint with your second colour. Start at the bottom. Allow a little of the tape to fold over onto the base of the pot. Align the edge of the tape to the left of one of the marks and draw the tape upwards to its partner mark on the top edge, making sure it is aligned to the left side of the mark. Moving towards the next mark to the right, repeat this, but align the tape to the right of both marks. In other words, the space you have marked with an x will be fully exposed, while the stripes either side of it will have the tape on. Repeat this, moving to the right, for the remaining marks. I suggest running your finger along the tape to ensure it has fully adhered to the pot. This will help ensure a crisp line when you paint. Step 6 Paint the spaces you have masked off with your second colour. Don't rush it, be careful you don't paint over the masking tape and onto one of the base colour stripes. It's no big deal if you do, as you can touch it up afterwards, but it only adds to the amount of time and effort you spend on this. Two coats, at least. Step 7 The fun bit. Gently remove the masking tape. Your pot is now beautiful and ready to plant!
These pots look fantastic planted out with bright annuals or geraniums. We planted a small lemon tree in ours, but the options are endless! Enjoy!
As Yet Unnamed I have a few naming options up my sleeves for this one, but feel in no hurry to settle on it now. I have four weeks, because that is how long this new soap will be curing before being boxed up, labelled and sent into the Shanghai Lil and The Scarlet Fez store! But let me tell you about what is in New Soap - olive oil, olive pomace, macadamia nut oil, shea oil and a dash of castor oil. But as if that isn't enough to make your skin soft and silky, I have added Mojave Living Clay! Mojave Living Clay is a calcium bentonite/montmorillonite clay from, you guessed it, the Mojave Desert in southern California! This clay is rich in minerals and is excellent for drawing out impurities in the skin. In a soap, the clay offers a silky texture which will enhance your bathing experience! Here it is, as a loaf, just before being hand cut into bars: